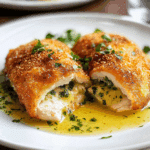
Best Chicken Kiev with Garlic Butter Recipe
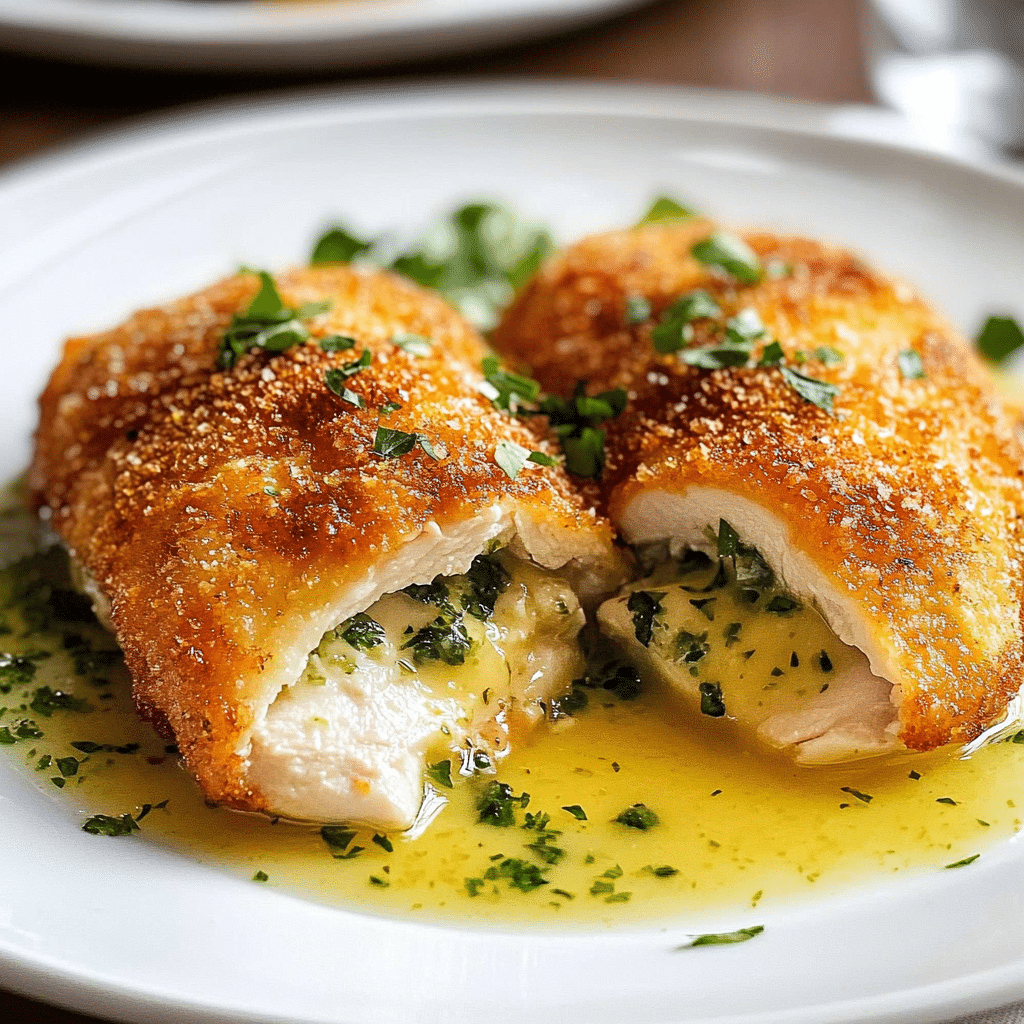
If you’re craving a dish that’s crispy on the outside yet melts in your mouth with a rich, buttery garlic center, then you’ve come to the right place. This Chicken Kiev with Garlic Butter recipe delivers just that—tender chicken lovingly wrapped around a luscious, flavorful garlic butter filling. Perfectly golden and irresistibly aromatic, this classic dish brings a delightful combination of textures and tastes that will have you reaching for seconds in no time. Whether it’s a family dinner or a special occasion, this recipe is your ticket to homemade comfort and elegance on a plate.
Why You’ll Love This Recipe
- Crispy Perfection: The coating fries up to a golden, crunchy crust that seals in all the juicy goodness inside.
- Garlic Butter Burst: Each bite reveals a luscious, melting garlic butter that adds incredible flavor.
- Simple Ingredients: Uses common pantry staples that come together quickly for a satisfying meal.
- Versatile Comfort Food: A timeless dish that works beautifully for weeknight dinners or entertaining guests.
- Impressive Presentation: Looks gourmet while being easy to prepare, impressing guests and family alike.
Ingredients You’ll Need
This Chicken Kiev with Garlic Butter recipe is a celebration of simple, fresh ingredients that build incredible layers of flavor. Each element plays a crucial role, from the tender chicken breast to the fragrant herbs and the crispy breadcrumbs, creating texture and taste harmony.
- Chicken breasts: Choose boneless, skinless breasts that are easy to flatten and roll.
- Unsalted butter: Provides the rich, melt-in-your-mouth garlic butter center—use high-quality for best flavor.
- Fresh garlic: Mincing garlic is essential to infuse the butter with that signature aromatic punch.
- Fresh parsley: Adds a herbaceous freshness and vibrant green color to the filling.
- Flour: Essential for dredging the chicken and helping the coating stick perfectly.
- Eggs: Acts as a sticky binder for the breadcrumb coating to adhere evenly.
- Breadcrumbs: Use fine or panko for a golden, crunchy crust that seals the butter inside.
- Salt and pepper: Simple seasoning that highlights and balances all the other flavors.
- Vegetable oil: For frying the chicken to crispy, golden perfection.
Variations for Chicken Kiev with Garlic Butter
One of the best things about this Chicken Kiev with Garlic Butter is how easily it adapts to your preferences or dietary needs. Feel free to get creative with flavors or tweak the recipe for a healthier or more indulgent version.
- Herb Infusion: Swap parsley for tarragon or chives to change the herbaceous notes inside the butter.
- Cheesy Twist: Add a bit of grated Parmesan to the breadcrumb coating for a rich, cheesy crust.
- Spicy Kick: Mix in chili flakes or cayenne pepper in the garlic butter for a subtle heat.
- Gluten-Free: Use almond flour or gluten-free breadcrumbs for a grain-free option.
- Oven-Baked Option: Instead of frying, bake the chicken for a lighter version that’s just as crispy.

How to Make Chicken Kiev with Garlic Butter
Step 1: Prepare the Garlic Butter
Start by softening the butter at room temperature until it’s easy to mix. Combine the butter with finely minced garlic, chopped fresh parsley, a pinch of salt, and pepper. Once fully incorporated, shape the butter into small logs or balls, then place them in the freezer to firm up. This step is crucial so that the butter stays inside the chicken during cooking.
Step 2: Flatten the Chicken Breasts
Using a sharp knife, carefully butterfly each chicken breast, slicing horizontally without cutting all the way through. Then, place the breasts between two sheets of plastic wrap and gently pound them to an even thickness of about half an inch. This makes wrapping the garlic butter easier and ensures even cooking.
Step 3: Assemble the Kievs
Place a frozen butter log in the center of each flattened chicken breast. Fold the edges over the butter and roll tightly to secure it completely inside the chicken. Make sure the butter is fully enclosed to avoid leaks while frying. You can use toothpicks to seal the ends if needed.
Step 4: Coat the Chicken
Prepare three shallow bowls: one with flour seasoned lightly with salt and pepper, one with beaten eggs, and one with breadcrumbs. First, dredge each rolled chicken breast in flour, tapping off any excess. Next, dip it into the beaten eggs, then thoroughly coat it in breadcrumbs, pressing gently so the crumbs stick well and form an even layer.
Step 5: Fry the Chicken
Heat vegetable oil in a deep pan to about 350°F (175°C). Carefully place the coated chicken breasts into the hot oil, frying them for about 5-7 minutes per side until they are golden brown and crisp. The internal temperature of the chicken should reach 165°F (74°C). Remove and drain on paper towels.
Pro Tips for Making Chicken Kiev with Garlic Butter
- Butter firmness: Always freeze the garlic butter logs before assembling to prevent leakage during cooking.
- Even pounding: Flatten chicken breasts to an even thickness for consistent cooking and easier rolling.
- Secure sealing: Use gentle but firm rolls and, if needed, toothpicks to keep the butter fully enclosed.
- Breadcrumb texture: For extra crunch, combine panko with regular breadcrumbs.
- Oil temperature: Monitor frying oil temperature carefully to avoid soggy coating or burnt crust.
How to Serve Chicken Kiev with Garlic Butter
Garnishes
Serve your Chicken Kiev with a sprinkle of freshly chopped parsley or a few sprigs of tarragon for a pop of color and fresh herbal aroma that complements the garlic butter beautifully.
Side Dishes
Mashed potatoes, roasted vegetables, or a crisp green salad are perfect companions to the rich and indulgent Chicken Kiev with Garlic Butter. Creamy mashed potatoes soak up the buttery sauce deliciously, while roasted veggies bring balance.
Creative Ways to Present
Try slicing the Chicken Kiev diagonally on a platter to showcase the gooey garlic butter center, or serve it on individual plates with a drizzle of lemon-infused oil to brighten the flavors further. A light dusting of paprika on top adds visual warmth.
Make Ahead and Storage
Storing Leftovers
Store any leftover Chicken Kiev in an airtight container in the refrigerator for up to 2 days. Keep in mind the coating might soften, so reheating carefully is key to preserving crispness.
Freezing
To freeze, assemble the Chicken Kiev completely but do not fry. Wrap them tightly in plastic wrap and place into a freezer-safe bag. Frozen Chicken Kiev can last up to 2 months; simply fry from frozen, adding a few extra minutes to cooking time.
Reheating
Reheat leftovers by placing them in a preheated oven at 350°F (175°C) for 15-20 minutes to restore crispiness. Avoid microwaving, which will make the coating soggy and melt the butter unevenly.
FAQs
Can I use chicken thighs instead of breasts?
Yes, boneless chicken thighs can be used, though they are juicier and slightly fattier. Make sure to flatten them evenly and adjust frying time slightly since thighs tend to cook a bit faster.
How do I prevent the garlic butter from leaking out?
Freezing the garlic butter before assembling is essential, and pounded chicken should be wrapped tightly. Sealing edges well and using toothpicks can also prevent leaks during frying.
Can I bake Chicken Kiev instead of frying?
Absolutely! Baking in a preheated oven at 400°F (200°C) for about 25-30 minutes can produce a crispy coating with less oil, making it a healthier alternative.
What can I serve with Chicken Kiev to keep it light?
Pair the dish with fresh salads, steamed green beans, or roasted asparagus to add crunch and freshness without weighing the meal down.
Is this recipe suitable for meal prep?
Yes! You can assemble and freeze Chicken Kievs ahead of time, then fry or bake straight from frozen for quick, delicious meals later in the week.
Final Thoughts
There’s something truly special about making Chicken Kiev with Garlic Butter at home—the satisfying crunch, the buttery garlic explosion, and the smiles around the dinner table. Give this recipe a try, and you might just find it becoming your go-to comfort meal that’s both impressive and comforting. Happy cooking and even happier eating!
Related Posts
PrintChicken Kiev with Garlic Butter
Chicken Kiev with Garlic Butter is a classic dish featuring tender chicken breasts wrapped around a rich, buttery garlic and herb filling, coated in golden breadcrumbs, and fried or baked to crispy perfection. With a luscious, melting garlic butter center and a crunchy exterior, this recipe delivers an impressive yet comforting meal suitable for any occasion.
- Prep Time: 20 minutes
- Cook Time: 15 minutes
- Total Time: 35 minutes
- Yield: 4 servings 1x
- Category: Appetizers
- Method: Frying (or Baking as option)
- Cuisine: European
- Diet: Gluten Free (if using gluten-free flour and breadcrumbs)
Ingredients
For the Chicken Kiev:
- 4 boneless, skinless chicken breasts
- 1 cup all-purpose flour (or almond flour for gluten-free)
- 2 large eggs, beaten
- 1 ½ cups fine breadcrumbs or gluten-free breadcrumbs
- Vegetable oil, for frying
- Salt and pepper, to taste
For the Garlic Butter Filling:
- ½ cup (1 stick) unsalted butter, softened
- 4 cloves fresh garlic, minced
- 2 tablespoons fresh parsley, finely chopped (or tarragon/chives as variation)
- Salt and pepper, a pinch
Instructions
- Prepare the Garlic Butter: Soften the butter at room temperature until easy to mix. Combine with finely minced garlic, chopped fresh parsley, and a pinch of salt and pepper. Mix thoroughly, shape the butter mixture into small logs or balls, then place in the freezer to firm up.
- Flatten the Chicken Breasts: Butterfly each chicken breast by slicing horizontally without cutting all the way through. Place breasts between two sheets of plastic wrap and gently pound to an even thickness of about half an inch to make rolling easier and ensure even cooking.
- Assemble the Kievs: Place a frozen garlic butter log in the center of each flattened chicken breast. Fold the edges over the butter and roll tightly to fully enclose the butter. Use toothpicks if needed to seal the ends securely and prevent leaks.
- Coat the Chicken: Prepare three shallow bowls—one with flour seasoned with salt and pepper, one with beaten eggs, and one with breadcrumbs. Dredge each rolled chicken breast in the flour, tapping off excess, dip into beaten eggs, then coat thoroughly with breadcrumbs, pressing gently to ensure the crumbs stick evenly.
- Fry the Chicken: Heat vegetable oil to 350°F (175°C) in a deep pan. Carefully fry the coated chicken breasts for 5–7 minutes per side, until golden brown and crispy. Ensure the internal temperature reaches 165°F (74°C). Remove and drain on paper towels.
Notes
- Always freeze the garlic butter logs before assembling to avoid leakage during cooking.
- Flatten chicken breasts evenly for uniform cooking and easier rolling.
- Use toothpicks to secure the chicken rolls if needed to prevent butter from leaking out.
- For extra crunch, mix panko breadcrumbs with regular breadcrumbs.
- Maintain oil temperature carefully to avoid soggy coating or burnt crust.
- Oven baking at 400°F (200°C) for 25-30 minutes is a healthier alternative to frying.
Nutrition
- Serving Size: 1 Chicken Kiev
- Calories: 450 kcal
- Sugar: 0.5 g
- Sodium: 350 mg
- Fat: 30 g
- Saturated Fat: 15 g
- Unsaturated Fat: 12 g
- Trans Fat: 0 g
- Carbohydrates: 20 g
- Fiber: 1 g
- Protein: 30 g
- Cholesterol: 120 mg
Keywords: Chicken Kiev, Garlic Butter, Crispy Chicken, Comfort Food, Classic Recipe, Homemade, Gluten-Free Option, Fried Chicken